In order for a weapon to accept a finish, it must have several additional textures prepared. Those textures store important information about how the weapon is formed, which areas are paintable, and how easily the finish gets worn on different parts. The majority of the stock weapons can accept finishes.
A compositing system combines information from the finish with information from the weapon’s textures to create a believable application.
The finishes themselves are relatively simple. They control things like the color, pattern, and shininess of the finish.
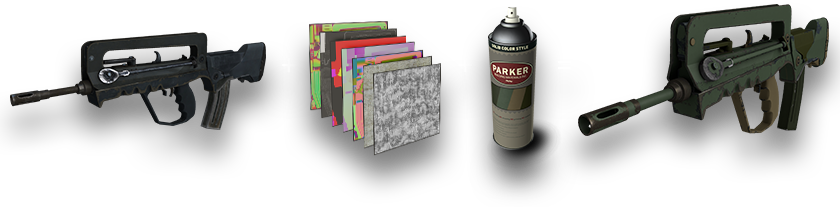
Patterns
The patterns used in the Spray-Paint, Hydrographic, Anodized Multicolored and Anodized Airbrushed styles all have the same basic properties. Each style can use up to four colors.
The pattern is applied one layer at a time, starting with a base coat that covers all paintable areas of the weapon.
Color images are typically stored in red, green and blue channels that combine additively to represent a large range of color values. For our patterns, we take advantage of this configuration to store three separate images. The final result is a bit bright, but don’t worry, what it looks like here isn’t how it’ll look on a weapon.
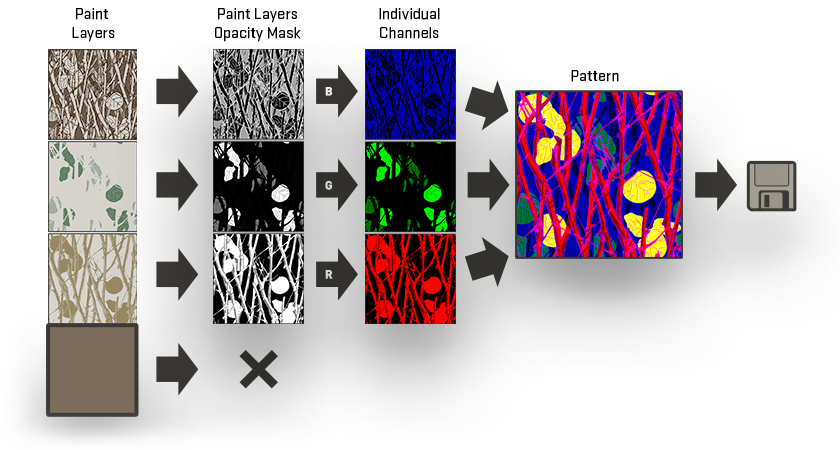
IMPORTANT! Copy the opacity of each layer into the RGB channels of a new image. The base coat is not included.
color0: Base coat |
color1: Red Layer |
color2: Green Layer |
color3: Blue Layer
Experiment with color harmonies
The same pattern can be reused with different colors to create a new finish.
Pattern Application Methods
Depending on the finish style, patterns are applied in one of two basic ways.
The first method simply tiles the pattern over the weapon’s existing UVs. To relate that to a real-world application, imagine disassembling the weapon into parts before applying the finish.
This application method is used for Hydrographic, Anodized Multicolored, Patina and Custom Paint Job styles.
The second method uses triplanar mapping. Think of it as spray painting though a stencil onto the sides, top, bottom, back and front of the weapon. The pattern blends across the surface normals.
This application method is used for Spray-Paint and Anodized Airbrushed Styles.
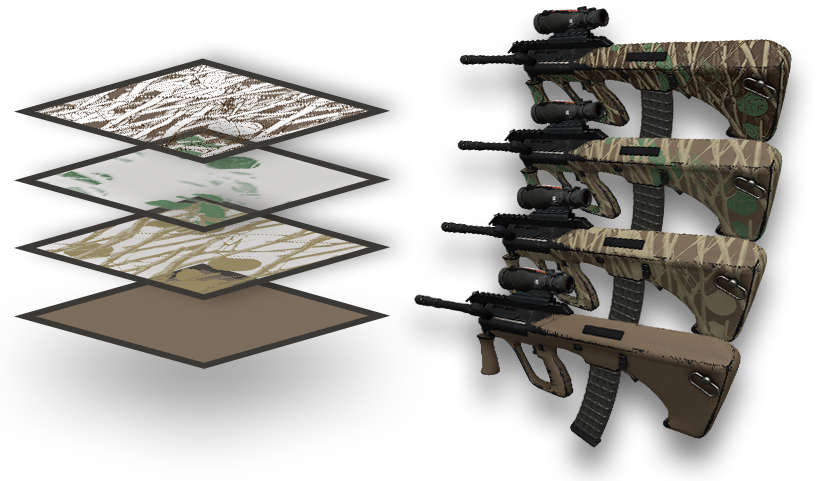
Pattern Scale
Paint kits that use patterns define a pattern scale. Increasing the scale repeats the pattern. Since the weapons are all different sizes, a paint on a large weapon will have correspondingly large features and a paint on a small weapon will have very tiny features. We fix this by further modifying the scale per-weapon.
For most styles the scale of the pattern is relative to a pattern sheet size of 36 inches. For styles that use triplanar mapping, 18 inches. In order for the size to be consistent, the pattern’s scale must be adjusted per-weapon.
For some finishes, the automatic scale adjustment per-weapon is not desired. It can be disabled by setting "ignore_weapon_size_scale" "1" in the finish’s properties.
Randomization
All paints specify ranges for offsets and rotations. On application, random values are chosen within those ranges so that each application is unique.
Paints also specify a range for wear. On application, a random value is chosen within that range. As the wear increases, more scratches appear on the surface and the weapon becomes grimier.
The texture responsible for the grime and the one for the scratch pattern are both placed randomly so that each wear pattern is unique, even when the wear amount is identical.
Durability and Masking
On top of their RGB channels, Color textures have an additional, optional “alpha” channel.
Each finishable weapon uses a special texture to determine what parts should receive finish. This texture also influences how quickly the finish wears off different features of the weapon. The original, unfinished material underneath is called the substrate. Some finish types can modify how the finish reveals the substrate by storing additional data in the pattern’s alpha channel.
Supported styles:
Hydrographic Style
Custom Paint Style
Anodized Multicolored Style
Gunsmith Style
When to use a pattern’s alpha channel:
Your design requires more coverage than the default
Your design requires more of the substrate to be revealed
Important features of your design wear too quickly
Important features of your design should never wear to the substrate
In general, finishes should be available in all wear values from Factory New to Battle Scarred with a few exceptions. That said the wear values don't have to be the full range and many weapon finishes ship with wear values from Factory New (0.0) to Battle Scarred (0.6).
Wear Value ranges:
Battle Scarred: 0.44-1.0
Well Word: 0.37- 0.44
Field Tested: 0.15-0.37
Minimal Wear: 0.07-0.15
Factory New: 0.00-0.07
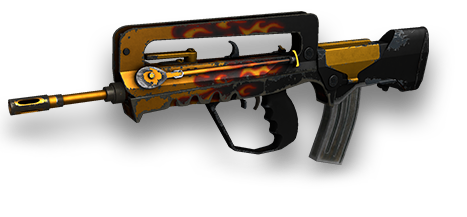
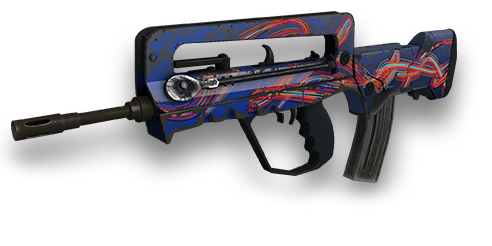
This finish uses the Custom Paint Job style, and has "Ignore Weapon Size Scale" enabled in order for the pattern to line up exactly with the weapon’s original UVs. We decided the design would improve if the magazine, grip, and barrel were unpainted.
There’s also an issue with the monster graphic on the buttstock. The eyes align with an exposed edge that gets easily scratched. Since the monster is an important feature of the design, we should make that portion of the graphic more durable so that it is readable even when the finish is well worn.
Values around 196 in the alpha channel subtract from the refinishable areas of the weapon. We find the barrel, grip and magazine in these areas:
Both 128 and 255 have no effect, so the finish wears using the default behavior in these areas:
Values below 128 in the alpha channel increase the durability of the finish. The darker the value, the more durable the paint. This is the area of the pattern where we find the monster:
Paint Roughness
Roughness defines how smooth or rough the surface is. By default, one value is used over the entire finish. Higher values represent rougher surfaces.
Anodized Multicolored Style allows the roughness to be specified in the alpha channel of the pattern texture. This allows finishes that look as though they are comprised of several different types and reflectivities of paint.
Anodized Multicolored also supports additional paint masking using the same value ranges as the Hydrographic and Custom Paint Job styles. As a result, the roughness values are stored only in the 0-127 range of the alpha channel.The roughness from the finish definition is used for values above 128. For back-compatibility with Counter-Strike finishes, roughness is inverted in this range, meaning higher values represent smoother surfaces. This only applies to values saved in weapon finish textures.
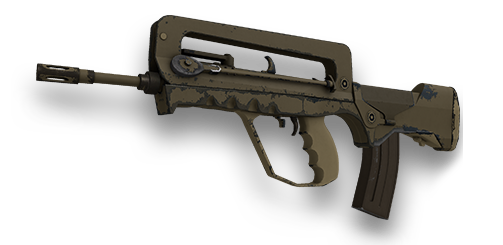
Gunsmith Style combines Patina and Custom Paint Job. Additionally, it allows the roughness to be specified in the alpha channel of the pattern texture for the areas of the weapon that are given a patina. The roughness value range is identical to Anodized Multicolored (0-127, inverted). The rest of the weapon is painted using the Custom Paint Job style, and allows paint masking using the alpha channel in those areas.
Physically Based Rendering
CS2 uses physically based rendering. Instead of authoring a diffuse texture as in Counter-Strike, artists will now use an albedo texture. This texture represents the physical reflectance of the surface.
For metallic finishes like Anodized Multicolored, Patina, and the metallic portions of Gunsmith, the effective RGB range is most likely between 180-250. Values as low as 90 may be acceptable depending on the color's saturation.
For non-metallic finishes, the effective reflectance range is between 55-220. Albedo values outside of these values will not respond appropriately to in-game lighting conditions. Finishes using values outside the effective PBR range are unlikely to be selected from the workshop.
Paint by Number
All finishable weapons are divided into regions that define how the finish styles apply their colors and patterns.
The diagram on the right shows an example of how the four colors of a Solid Color Style finish might be applied.
Other paint by number charts control which areas can be anodized or given a patina, and where patterns and accent colors appear for Anodized Multicolored and Hydrographic styles.
There are also predefined areas on each weapon that don’t get refinished, such as shell casings, the inside of barrels, firing rods, etc.
The best way to visualize the paint by number areas on a weapon is to load it up in the CS2 Workshop Workbench and assign some colors.
Normal Map
A normal map can give the weapon finish an appearance of depth or bumps without adding more polygons through the use of lighting. Using a normal map can add subtle details to a finish like wood grain or they can be used to create more pronounced changes. Normal maps can be applied to Patina, Custom Paint, and Gunsmith finish styles.
Creating a Finish
Finishes are defined by a set of parameters that are stored in a plain text files. These text files are generated by the CS2 Workshop Workbench. Save and load your works-in-progress directly in the game client. You can copy the examples in the next section into text files, then load those text files to see the finishes in-game.
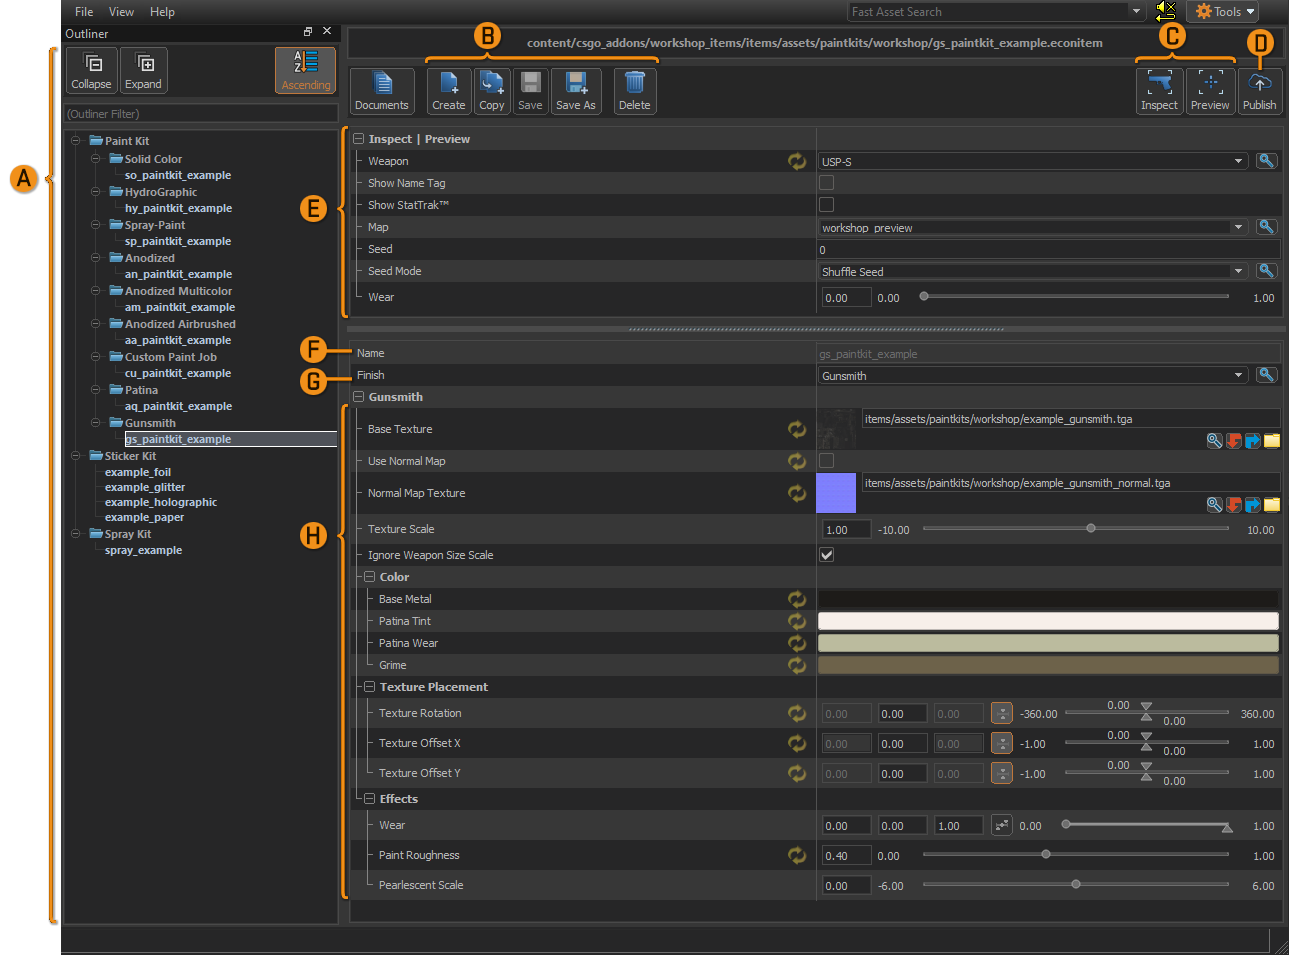
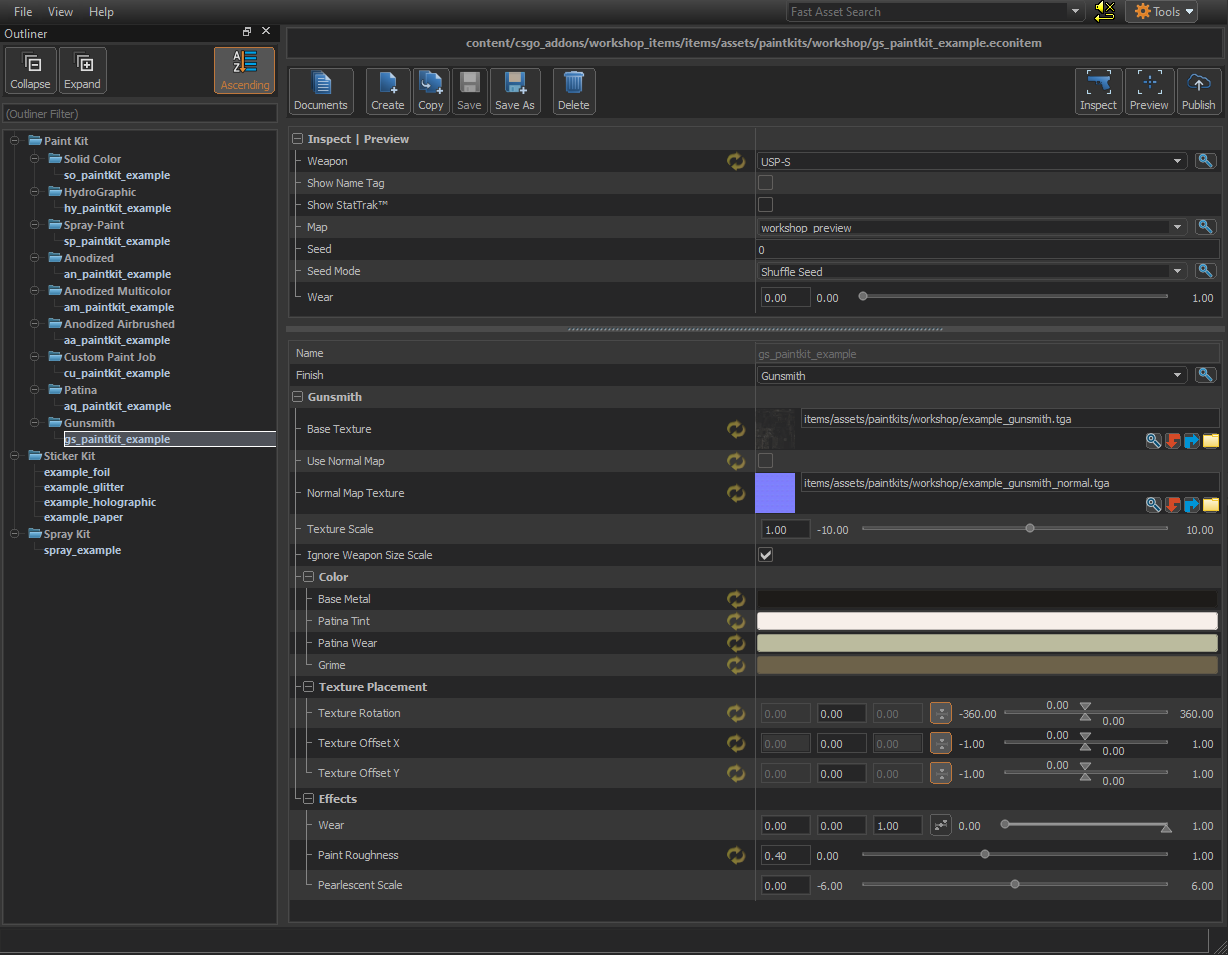
A Outliner: This area contains your econitem files organized by item type ( Paint Kit, Sticker Kit, and Spray Kit ).
B Buttons Mnipulate the currently selected item in the Outliner.
C Inspect buttons display selected econitem using the inventory inspect interfacePreview Button: load into preview map and equip selected econitem.
D Publish selected econitem to the Counter-Strike 2 workshop.
E Settings used to Inspect/Preview selected econitem.
F Unique name for econitem file.
G Select Finish Style for econitem.
H Parameters for selected Finish Style.
Solid Color Style
- Choose four colors to paint a weapon
- The colors are applied through a predefined paint by number system
- This finish wears directly to the substrate
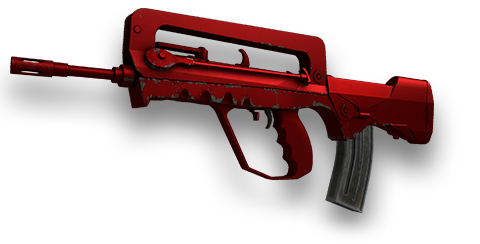
Spray-Paint Style
- Choose four colors and a pattern to paint a weapon
- The pattern is applied via triplanar mapping
- Each layer of paint wears successively to the layer below it before revealing the substrate
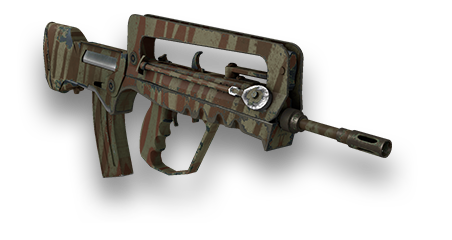
Hydrographic Style
- Choose four colors and a pattern to paint a weapon
- The pattern is applied via the weapon’s original UVs
- A predefined paint by number system determines which parts will be hydro-dipped and which will be painted solid colors
- The solid color areas use Green Channel and Blue Channel
- This finish wears directly to the substrate
- Optional durability and masking are accessible via the pattern’s alpha channel
Anodized Style
- Choose one color to paint the weapon
- The anodized effect paint is applied to areas specified by a predefined paint by number system
- This finish wears first to the chrome base coat before revealing the substrate
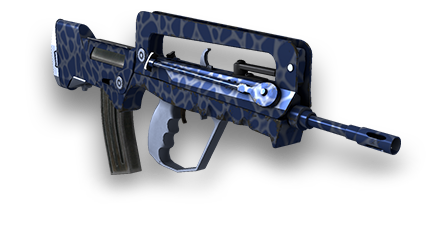
Anodized Multicolored Style
- Choose four colors and a pattern to paint a weapon
- The pattern is applied via the weapon’s original UVs
- A predefined paint by number system determines which parts will be paterned and which will be painted solid colors
- The solid color areas use Green Channel and Blue Channel
- This finish wears directly to the substrate
- Exponent and masking are accessible through the pattern’s alpha channel
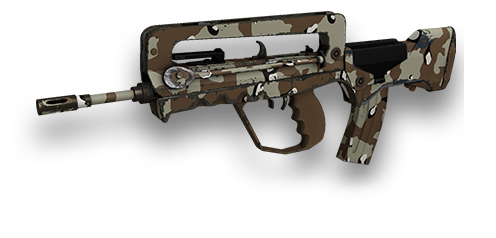
Anodized Airbrushed Style
- Choose four colors and a pattern to paint a weapon
- The pattern is applied via triplanar mapping
- A predefined paint by number system determines which parts will be airbrushed and which will be painted solid colors
- The solid color areas use Green Channel and Blue Channel
- This finish wears first to the chrome base coat before revealing the substrate
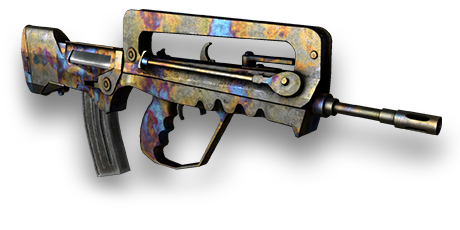
Patina Style
- Choose four colors and a full-color image to create the patina
- The image is applied via the weapon’s original UVs
- Supports the addition of a normal map
- The colors influence the look of the patina at different ages
- Base Metal: the metal before patina, revealed through scratches
- Patina Tint: tint of the newly applied patina
- Patina Wear: tint of the aged patina
- Grime: color of the grime, oil accretion, or oxide that accumulates in cavities
Custom Paint Style
- Choose a full-color image to apply as a paint
- The pattern is applied via the weapon’s original UVs
- This finish wears directly to the substrate
- Durability and masking are accessible through the pattern’s alpha channel
- Supports the addition of a normal map
Gunsmith Style
- Combines Patina and Custom Paint Job styles
- A predefined paint by number system determines which parts will have a patina and which parts will be custom painted
- Choose four colors to determine the wear characteristics of the patina
- Exponent is accessible through the pattern’s alpha channel for the patinated parts
- Masking is accessible through the pattern’s alpha channel for the custom painted parts
- Supports the addition of a normal map
 Item Tool
 Finish Styles
 Technical Overview
 Patterns
 Pattern Application Methods
 Pattern Scale
 Randomization
 Durability and Masking
 Paint Roughness
 Paint by Number
 Creating a Finish
 Solid Color Style
 Spray-Paint Style
 Hydrographic Style
 Anodized Style
 Anodized Multicolored Style
 Anodized Airbrushed Style
 Patina Style
 Custom Paint Style
 Gunsmith Style